Advanced editing
Linked cells
A handy advantage of Gridmonger over pencil-and-paper mapping is the ability to establish cell links. You can create links between the following floor types:
Pits and ceiling pits
Teleport sources and destinations
Upward and downward stairs
Entrance and exit doors
You can jump between linked cells by pressing the G key, which is very
useful when navigating complex, interlocking, multi-level dungeons. The
included Eye of the Beholder I and The Dark Heart of Uukrul example
maps are great demonstrations of this.
To create a link, move the cursor to the source cell and press Shift+G to enter Set Link Destination Mode. Now move the cursor to the target cell, then press Enter to create the link or Esc to cancel. All common navigation shortcuts are available in this mode, so you can change the current level, zoom in and out, etc. The Mouse movement actions can also be used.
The destination cell will be overwritten (if it doesn’t already contain the destination floor type), but any existing note will be preserved (and potentially converted to a None marker type). Once a link has been created, small triangles will appear in the bottom-left corners of the linked cells.
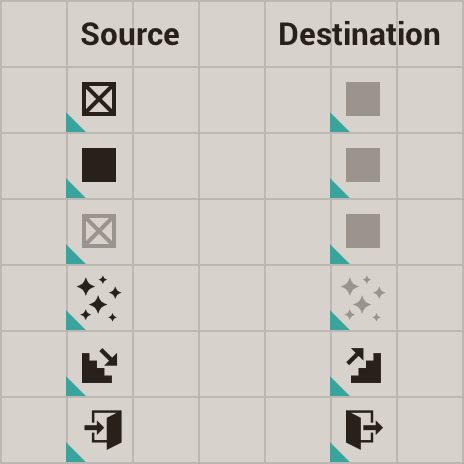
Examples of linked cells
To jump back and forth between two linked cells, place the cursor at either end of the link, then press G.
Some cells may have multiple linked locations; this is currently only possible
by linking multiple teleport sources to a single destination. If you press
G on such a teleport destination cell, you will enter location
selection mode, where you can select between the source locations with the
movement keys. Press Enter or Esc to exit from location
selection mode, or press G again to return to the destination cell. The
included Wizardry example map contains such multi-source teleports.
To show lines connecting all linked cells in the level, hold down the ' key (apostrophe key, to the left of Enter). There are also Preferences options to show the link lines for the current cell, or to always display all link lines.
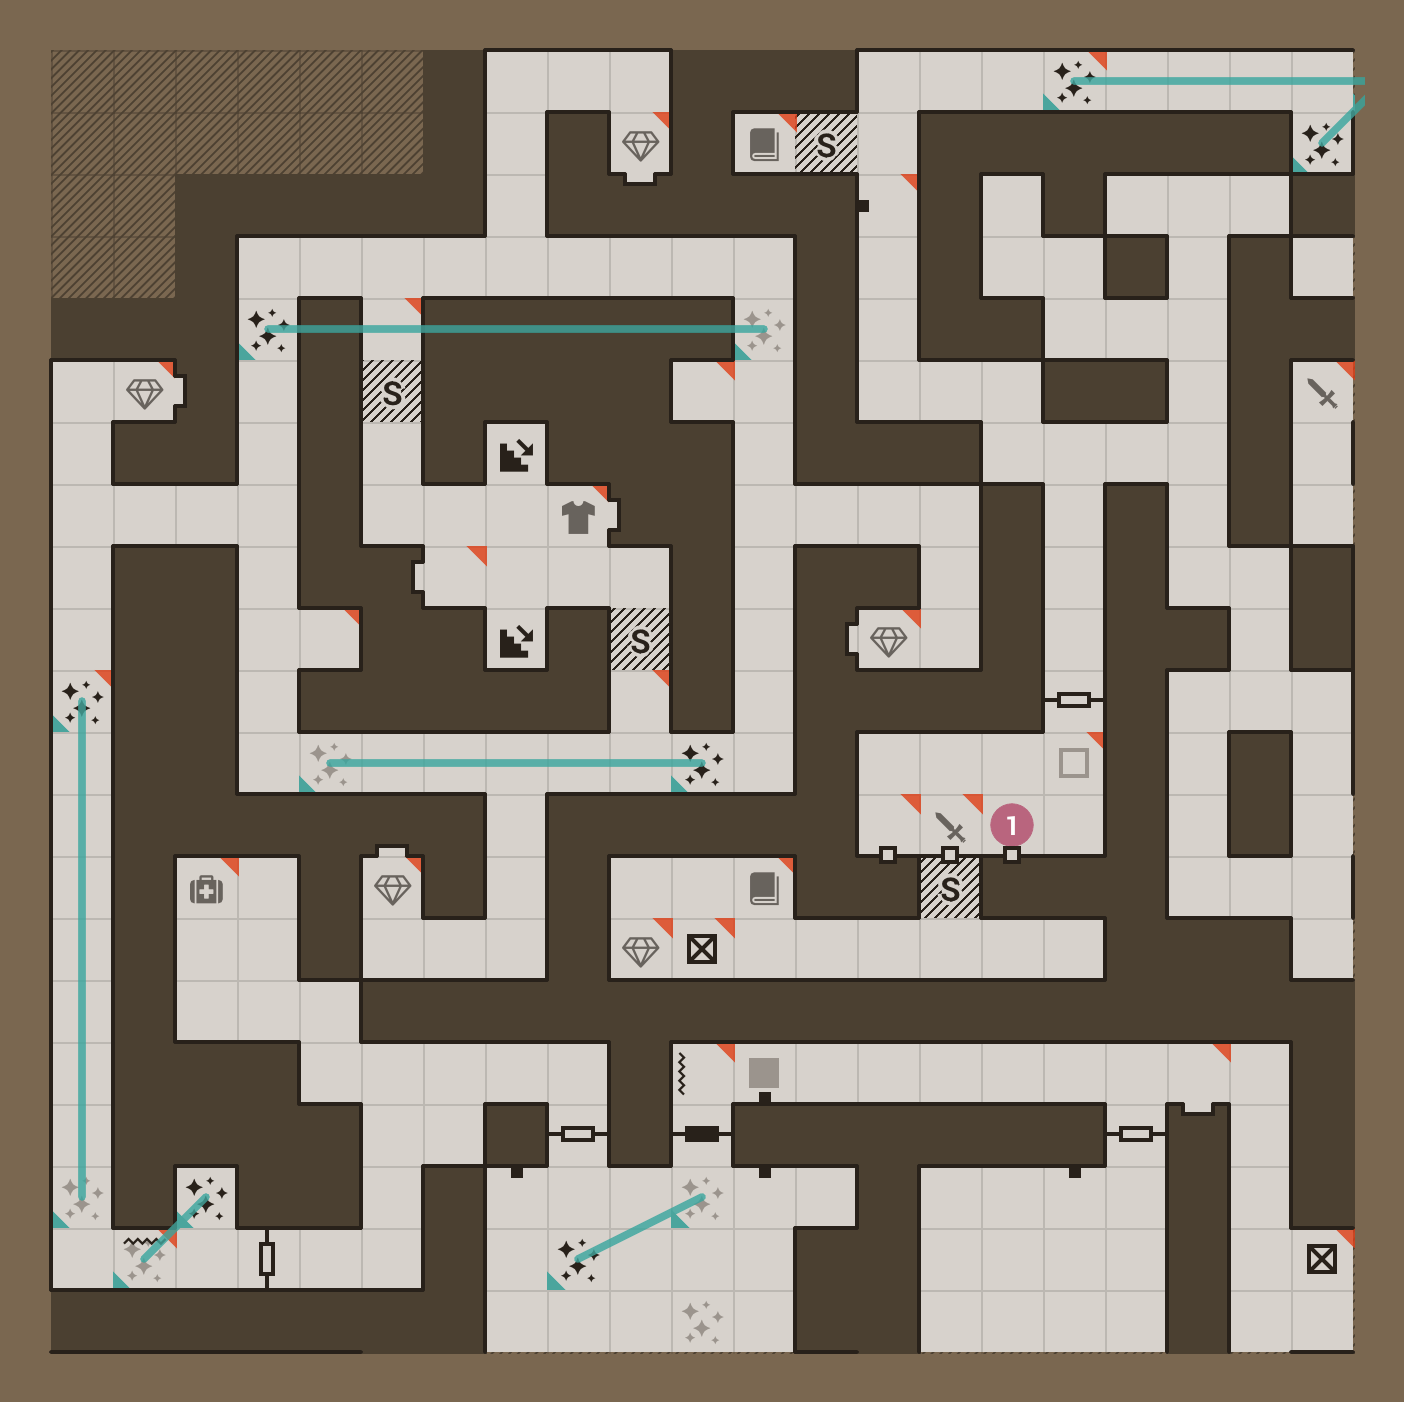
Show Link Lines in action — the blue lines indicate linked cells
If you delete a linked cell, change its floor type, put a label on it or an annotation with a type other than None, the link will be severed. Again, multi-source teleports are an exception — deleting a single source will leave the remaining source-destination links intact.
The exact rules for creating links vary per linkable floor type:
- Pits
The link source must be a closed, open or hidden pit. The link destination is always set to a ceiling pit.
- Teleports
The link source can be either a teleport source or a teleport destination. The destination cell is automatically set to the other teleport type. Teleport destination is the only floor type that can be linked to multiple sources.
- Stairs
The link source can be either a downward or an upward stairs cell. The direction of the stairs will be automatically adjusted based on the elevation of the levels at the two ends of the link.
- Doors
The link source can be either an entrance or an exit door. The destination cell is automatically set to the other door type.
Note
A cell cannot simultaneously be a link source and a destination, so you cannot create chain-linked teleport cells or multi-level staircases. Furthermore, except for multiple teleport sources linking to the same destination, you can only create links between precisely two cells.
All these constraints are enforced at link creation time: if the source or the destination cell is already part of a link, that link will be severed before creating a new one (except for multi-source teleports).
Selections
The idea behind selections is simple: you select some cells first, then perform an action on them.
All editing actions presented so far have to be invoked from Edit Mode, which is the default operational mode of the program. To make a selection, you need to enter Select (Mark) Mode by pressing M. The cursor will turn into a crosshair, and you will see the list of available actions for manipulating the selection in the status bar.
You always start with nothing selected when entering Edit Mode. To add a rectangular area to the selection, hold R and use the movement keys. For simplicity’s sake, you can only use Normal Mode movement keys when working with selections, regardless of the currently active editing mode (WASD Mode, Walk Mode, etc.) Selected cells are tinted pink (in most themes; the actual colour is theme-dependent). To subtract a rectangular area from the current selection, hold S and use the movement keys.
Similarly, you can “draw” the selection or “erase” from it by using the D and E modifier keys with the movement keys, respectively. A selects the whole level (Select All), and U or X clears the selection (Unselect All).
Undo and redo are not available when working with selections, so exercise some caution.
Note
The U shortcut is not available with YUBN keys enabled.
Tip
The Mouse movement actions are available in Select Mode, too, to move the cursor or pan the level. This opens up some interesting possibilities; e.g., you can draw selections with the mouse when used together with the D and E modifiers.
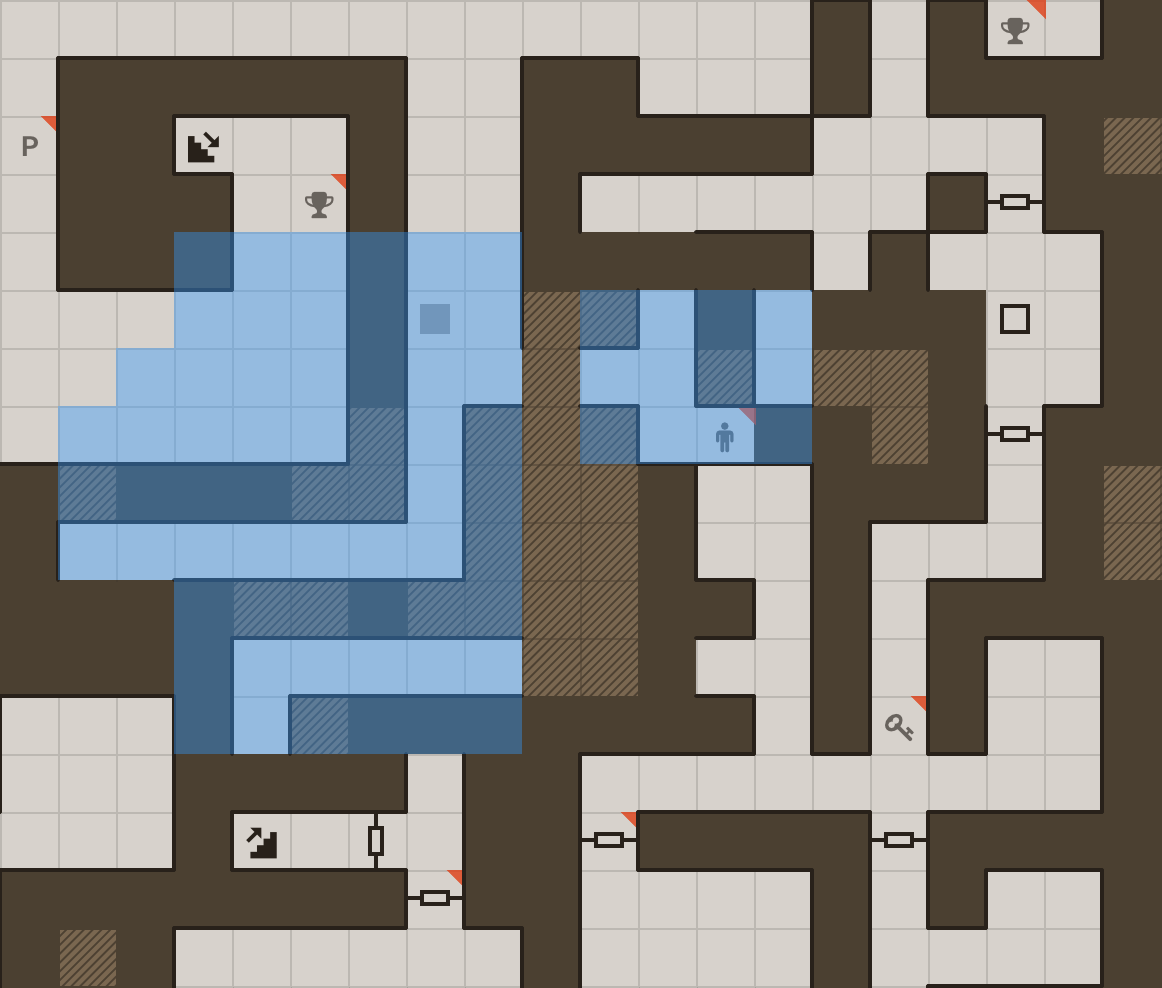
Marking a non-contiguous area in Select Mode
When you’re happy with your selection, it’s time to perform an action on it. C or Y copies (yanks) the selected cells into the paste buffer and returns to Edit Mode.
Note
The Y shortcut is not available with YUBN keys enabled.
Press P to paste the buffer’s contents at the current cursor position. Links are not copied, but you can paste the copied content as many times as you wish. This restriction is necessary to maintain link integrity.
If you press Shift+P, you’ll enter Paste Preview Mode, where you can position the selection interactively with the movement keys (usually shown in a light-blue overlay, which is, again, theme-dependent). Then, you can perform the paste action by pressing Enter or cancel it with Esc. Note that you can also switch the current level in Paste Preview Mode. Naturally, the Mouse movement actions are available, too.
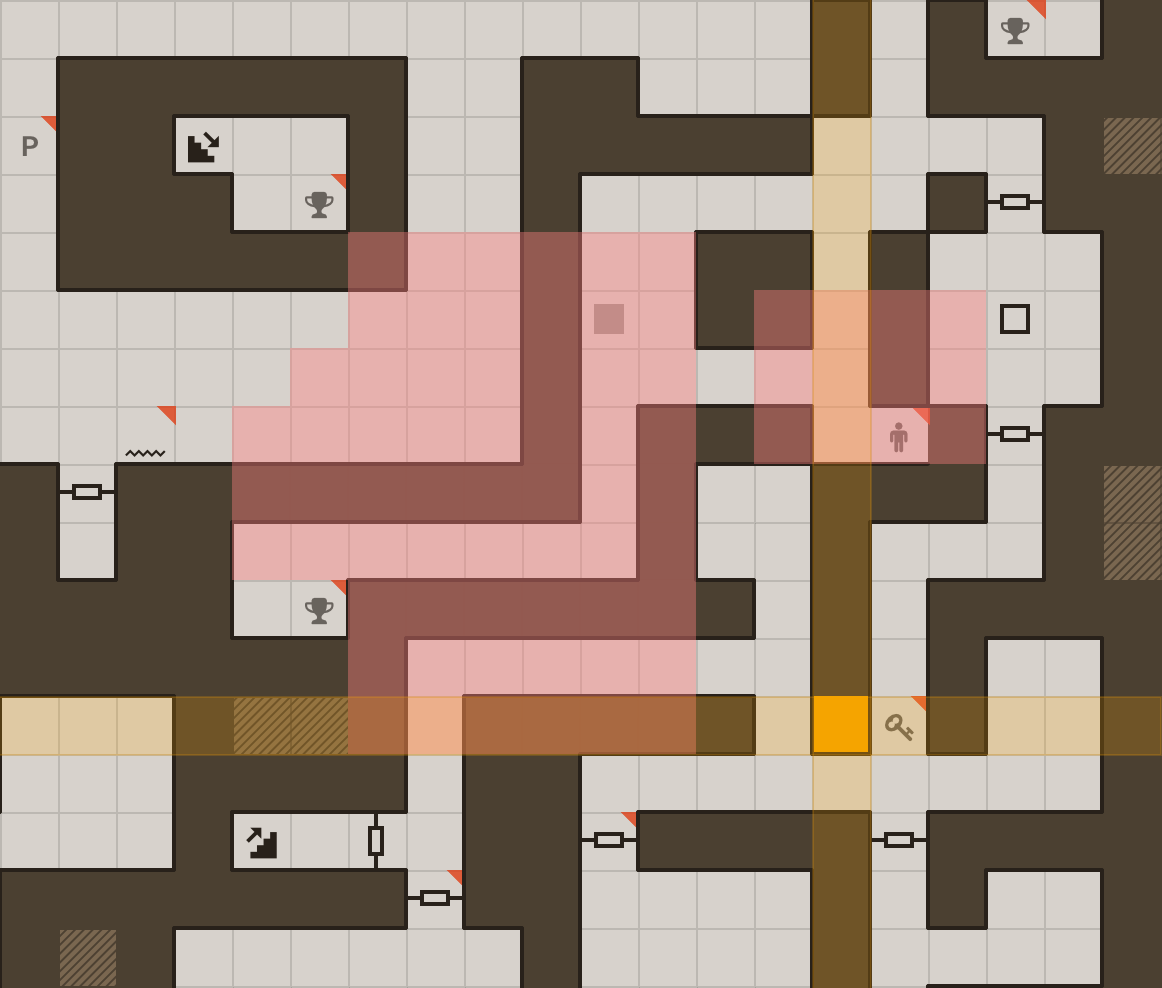
Positioning the selection in Paste Preview Mode
If you move the selection beyond the level’s boundaries, parts of it will become clipped. By enabling wraparound, the cells shifted beyond one edge of the level will “wrap around” to the opposite side. You can toggle wraparound with the W key while in Paste Preview Mode. The status bar indicates whether wraparound is enabled or not.
Tip
The contents of the paste buffer are preserved when opening another map file. Although you can only edit a single map at a given time, this allows you to copy-paste whole or partial levels between two maps.
Holding Ctrl in Select Mode will reveal a list of further special actions in the status bar:
- Move Ctrl+M
The link-preserving alternative to the copy action: the selected cells will be cut first, then you will be automatically taken into Paste Preview Mode, where you can reposition the selection. Note that the move action will leave the contents of the paste buffer intact (it uses a dedicated move buffer under the hood). Wraparound is available when moving selections too; you can toggle it with the W key.
- Erase Ctrl+E
Equivalent to using the erase cell action on the selected cells.
- Fill Ctrl+F
Equivalent to using the draw/clear floor action on the selected cells.
- Set colour Ctrl+C
Set the floor colour of the selected cells to the current colour.
- Surround Ctrl+S
Surround the selected cells with solid walls (you can use this with the select rectangle action to draw rectangular rooms quickly).
- Crop Ctrl+R
Crop the level to the bounding box of the selection.
Special level actions
There are a few special actions you can invoke from Edit Mode that operate on the whole level.
Resize level
The resize level action, invoked with Ctrl+E, lets you shrink or expand the dimensions of the current level. You’ll need to select an anchor point for the action. It’s probably easiest to illustrate the role of the anchor point through a few examples:
Making the level 2 columns and 3 rows larger using the top-left anchor point will add 2 extra empty columns at the right side of the level and 3 extra empty rows at the bottom.
Making the level 4 columns and 4 rows smaller using the centre anchor point will remove a 2-cell wide “stripe” from around the level.
Nudge level
You can shift the contents of the level around without changing its dimensions with the nudge level action.
Press Ctrl+G to enter Nudge Preview Mode, then use the movement keys to reposition the level’s contents.
Similarly to Paste Preview Mode, you can enable wraparound with the W key when nudging levels.
Accept the changes by pressing Enter or discard them with Esc.