Basic editing
Most cRPG maps tend to fall into one of two categories: tunnel style maps, and the more compact wall style maps (for lack of better terms). There’s also a less common third hybrid style that combines elements from both.
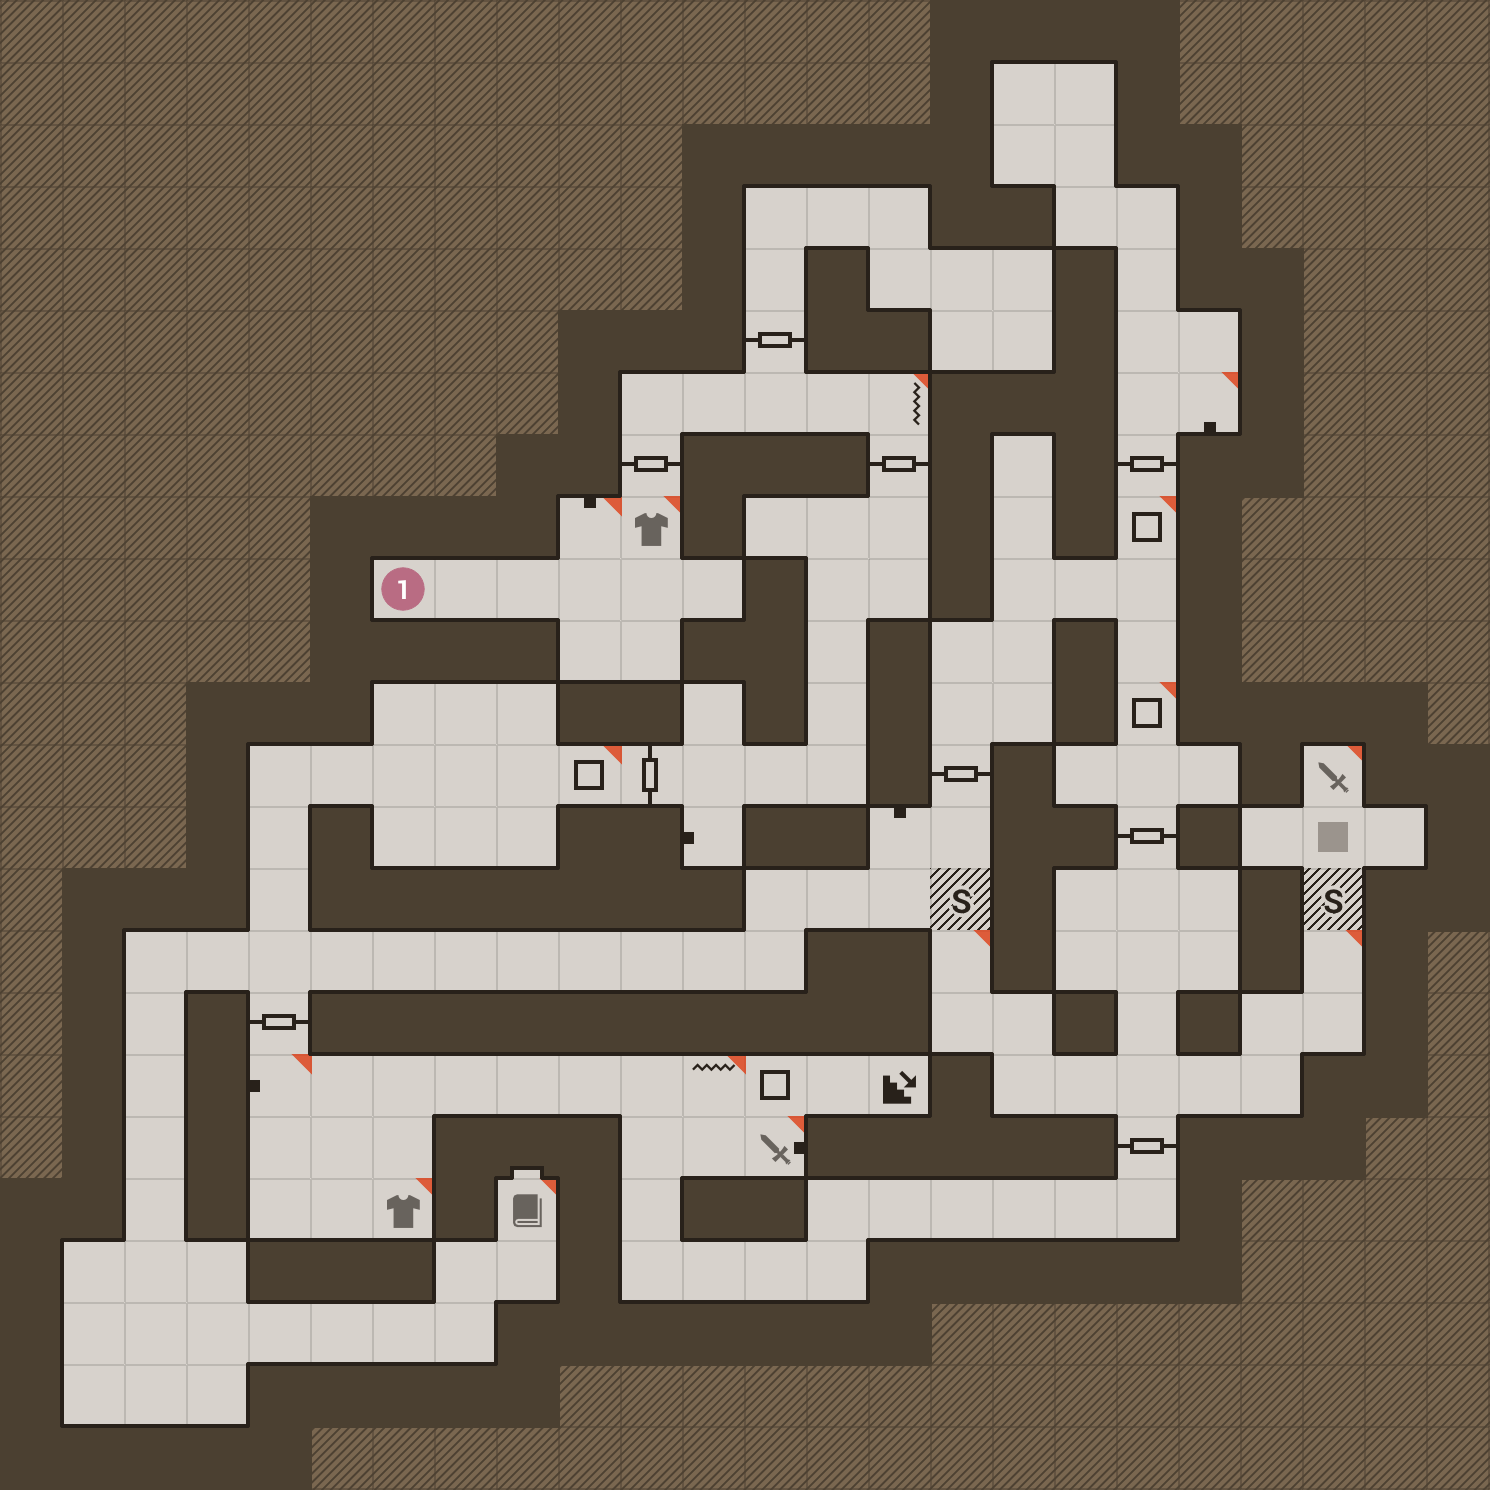
Tunnel style — Eye of the Beholder I
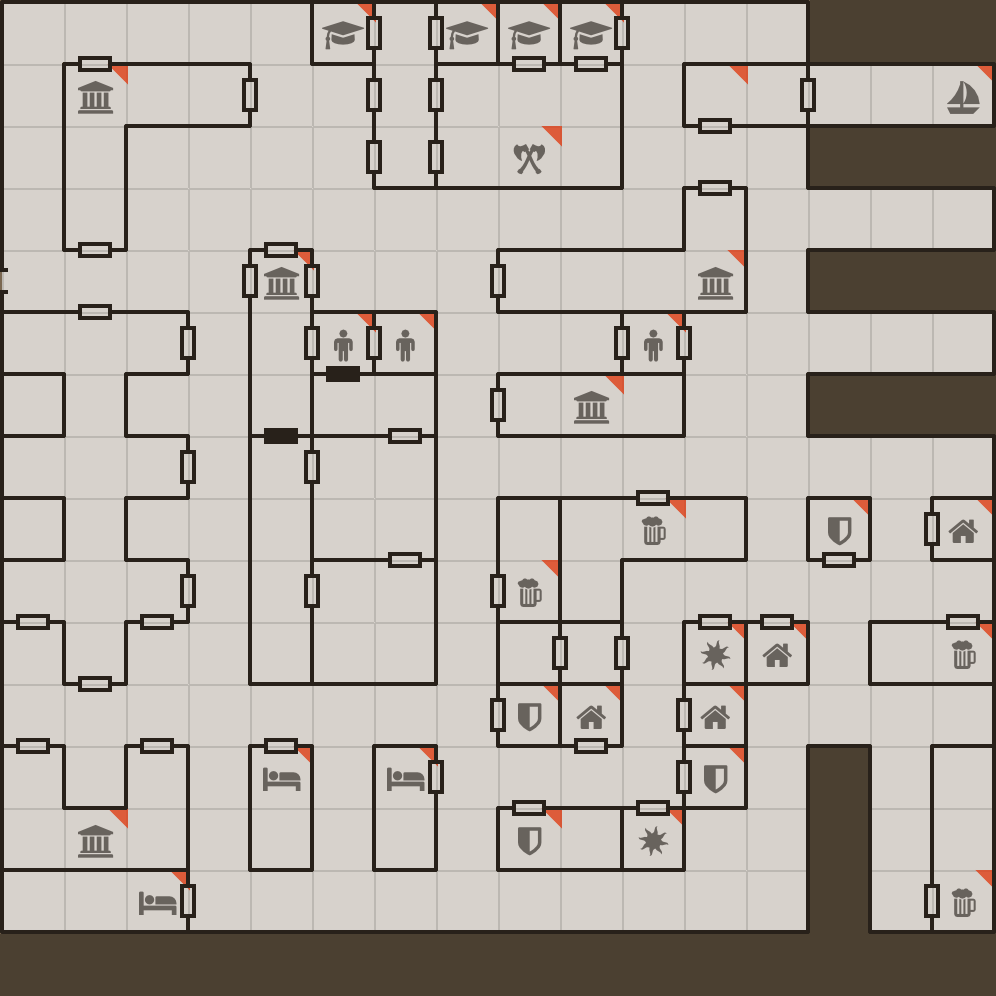
Wall style — Pool of Radiance
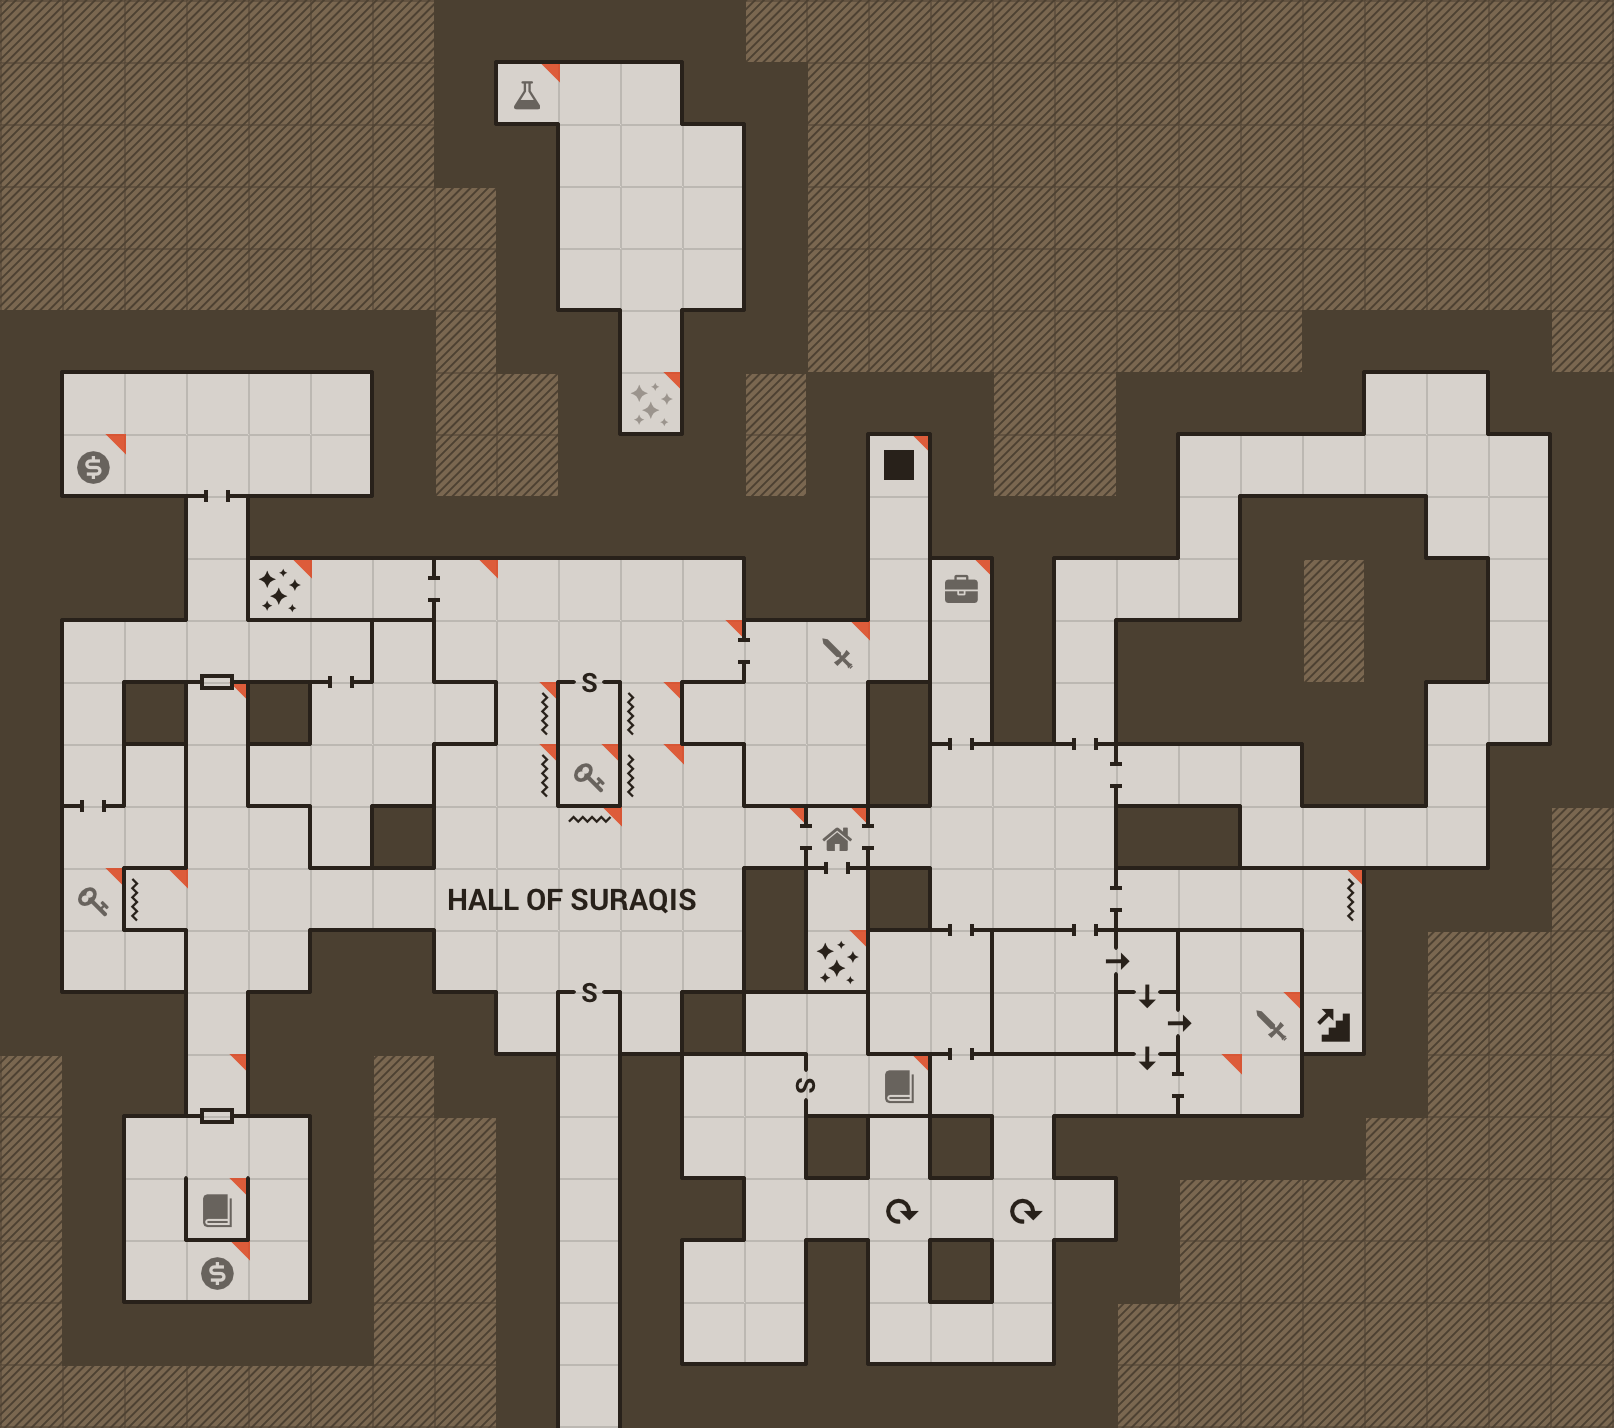
Hybrid style — The Dark Heart of Uukrul
The above maps are included in the example maps pack that comes with Gridmonger.
Editing tools
Gridmonger has a number of handy map editing tools at your disposal.
Tunnel style maps are easiest to create with the excavate (draw tunnel) tool. To use it, hold down the D key and use the movement keys. The name “excavate” is quite fitting, as all existing cell content will be deleted. Junctions are automatically created on tunnel crossings, and neighbouring cells are joined into larger areas. Of course, you can press D without moving the cursor to excavate only the current cell.
The D key acts as a modifier key when used together with the movement keys (similarly to Shift or Ctrl). There are a few other tools that work the same way:
E – Erase whole cell, including walls (we’ll talk about walls shortly)
F – Draw/clear floor
C – Set floor colour
Naturally, all tools are compatible with Movement wraparound.
New cells are drawn with the current floor colour, which is indicated in the tools pane on the right. You can toggle the visibility of the tools pane with Alt+T. To cycle through the available floor colours, press the , and . keys. To “pick” the floor colour from the current cell, press I.
Gridmonger has a virtually unlimited undo history (only limited by your computer’s memory). You can undo most actions with U, Ctrl+U, or Ctrl+Z and redo them with Ctrl+R or Ctrl+Y. The only action that cannot be undone is the creation of a new map which discards the current map.
Floor types
So far so good, but how do we create doors, pressure plates, pits, teleports, and all sorts of other paraphernalia brave adventurers frequently run into in well-designed dungeons?
In tunnel style dungeons these contraptions take up an entire cell, so they are represented as different floor types. You can draw them with the number keys 1 to 8. But there are more than 20 floor types in total, so how does that exactly work?
Each number key is assigned to up to four floor types. You can cycle forward between all floor types assigned to a particular number key by pressing the key multiple times repeatedly, and backward by pressing the key with the Shift modifier.
| Key | Floor | Name |
|---|---|---|
| 1 |  |
Open door |
 |
Locked door | |
 |
Archway | |
| 2 |  |
Secret door |
 |
Secret door (block style) | |
 |
One-way door | |
| 3 |  |
Pressure plate |
 |
Hidden pressure plate | |
| 4 |  |
Closed pit |
 |
Open pit | |
 |
Hidden pit | |
 |
Ceiling pit | |
| 5 |  |
Teleport source |
 |
Teleport destination | |
 |
Spinner | |
 |
Invisible barrier | |
| 6 |  |
Stairs down |
 |
Stairs up | |
 |
Entrance door | |
 |
Exit door | |
| 7 |  |
Bridge |
| Arrow | ||
| 8 |  |
Column |
 |
Statue |
Most door types can be oriented either horizontally or vertically. When placing them in tunnels (as you normally would), they are automatically oriented correctly. Should you need it, you can always change the floor orientation manually with the O key.
These three floor types are a bit special:
The one-way doors can be oriented towards any of the four cardinal directions. When you place a one-way door, it always points northwards. You can then rotate it clockwise or anti-clockwise with O and Shift+O, respectively.
You can similarly rotate the arrow floor type which can represent conveyor belts or force-fields that push the party towards the indicated direction.
The bridge floor type has a small amount of “overhang” that extends into its two adjacent cells. You can draw long continuous bridges by placing multiple bridge cells next to each other.
These floor types should take care of most of your dungeoneering needs. The goal was to keep it simple and not overcomplicate matters by allowing user-defined custom types. In the rare case where you really need something not covered by these, you can always just add a note to the cell using a custom ID as you will learn in the Annotations chapter.
Wall types
Drawing walls works slightly differently. The program makes a distinction between regular walls (the most common wall type) and so-called special walls.
To draw regular walls, hold down the W modifier key and press one of the movement keys. This toggles the current cell’s wall in the selected direction according to the following rules:
If no wall exists in that direction, a regular wall is created.
If the existing wall is a regular wall, the wall is removed.
If the existing wall is a special wall, it is turned into a regular wall.
Although this might sound a bit complicated, it’s really simple and intuitive in practice — just give it a go and you’ll see!
Note
For simplicity’s sake, you can only use Normal Mode movement keys with the draw wall modifier, regardless of the currently active editing mode (WASD Mode, Walk Mode, etc.)
Special walls are used for drawing all the different door types you’ve seen previously as wall types, plus to represent some gadgets such as levers, statues, keyholes, etc.
Drawing special walls works similarly to the method described above — hold down the R modified key and press one of the movement keys. This will use the current special wall type, as indicated in the right-side tools pane. To change the current special wall type, use the [ and ] keys or the Alt-based shortcuts shown below:
| Key | Special wall | Name |
|---|---|---|
| Alt+1 |  |
Open door |
| Alt+2 |  |
Locked door |
| Alt+3 |  |
Archway |
| Alt+4 |  |
Secret door |
| Alt+5 |  |
One-way door |
| Alt+6 |  |
Illusory wall |
| Alt+7 |  |
Invisible wall |
| Alt+8 |  |
Lever |
| Alt+9 |  |
Niche |
| Alt+0 |  |
Statue |
| Alt+- |  |
Keyhole |
| Alt+= |  |
Writing |
One-way doors are a bit special; their arrows always point towards the drawing direction. If you want to flip the direction of the arrow, just go to the “other side” of the door and draw it again in the opposite direction! The lever, niche, statue, and writing special wall types are similarly “directional”.
Open-ended excavate
The ends of the tunnels created with the excavate (draw tunnel) are closed off with a regular wall by default. Some people might prefer leaving them open, though. This could come in handy when exploring tunnel style maps; an open tunnel would signal there’s more to explore in that direction.
You can enable this feature with the Open-ended excavate checkbox in the Editing tab of the Preferences dialog.
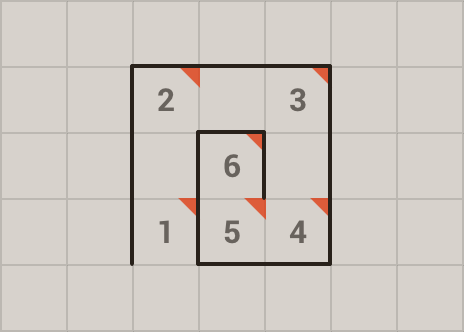
The below map illustrates the difference between the two operational modes. The same tunnel structure was drawn twice as a single uninterrupted excavate action with Open-ended excavate disabled (left) then enabled (right), going from one numbered location to next in order.
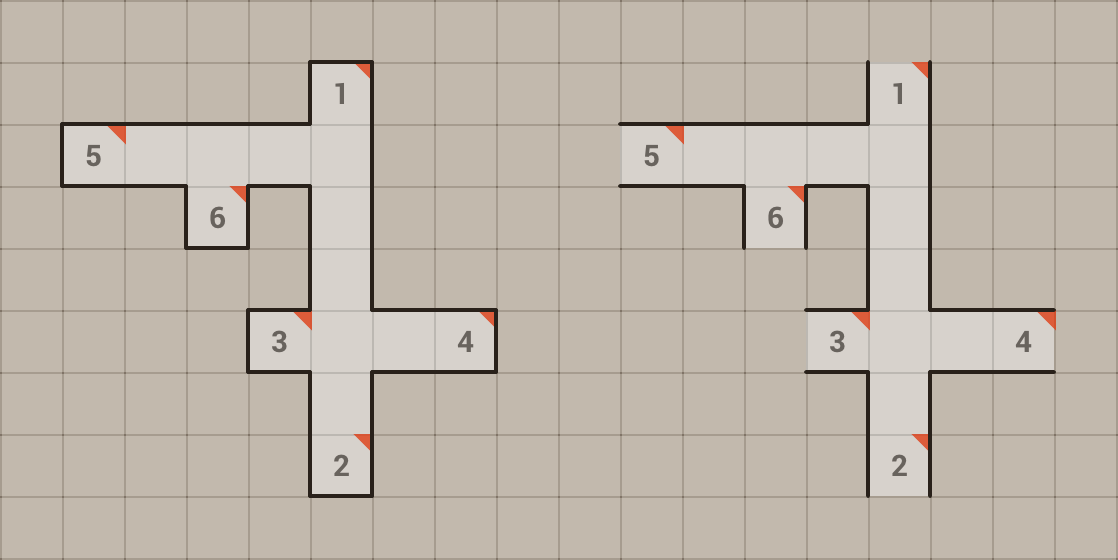
Left: open-ended excavate disabled (close off tunnels with walls)
Right: open-ended excavate enabled
Tip
If you want to close the end of a tunnel you’ve just created and the cursor is still at the end of it, press and release D once again without using the movement keys. This trick is also useful to close off the “last missing wall” when enlarging rooms with the open-ended exacavate tool.
Draw wall repeat
So far we’ve seen how to draw walls in a single cell, but what about drawing long continuous walls with a minimal number of keystrokes? Of course, this is Gridmonger, so there is a way to do just that!
After you have set or cleared a wall in a cell, you have the option to repeat that action horizontally or vertically, depending on the orientation of the wall you’ve just manipulated. So, if you’ve set or cleared the north or south wall, you can repeat that action in the horizontal direction; similarly, if you’ve manipulated the east or west wall, you can repeat that action in the vertical direction.
To use this feature, first set or clear a wall in the current cell using the W modifier, then hold down Shift without releasing W to enter draw wall repeat mode. Now you can use the movement keys to repeat the draw wall action either horizontally or vertically, depending on the orientation of the wall you’ve drawn first.
Although you won’t need this often, you can use the repeat feature with the S draw special wall modifier too.
The usage of the repeat tool is probably best illustrated with an example. Let’s see how to draw a spiral with it!
Drawing a spiral with the draw wall repeat tool
Move the cursor to 1, hold down W and keep it held down until you
have reached 6 while carrying out the following (the arrow keys represent
any of the Normal Mode movement keys). Pay attention to
the status bar messages after each keystroke!
Press ←, hold down Shift, press ↑ twice, release Shift.
Press ↑, hold down Shift, press → twice, release Shift.
Press →, hold down Shift, press ↓ twice, release Shift.
Press ↓, hold down Shift, press ←, release Shift.
Press ←, hold down Shift, press ↑, release Shift.
Press ↑, then press →. You can release W now, the spiral has been completed!
Now draw a few more spirals and similar shapes on your own! After a few minutes of practice, using the repeat tool should become second nature to you.
Trail Mode
In Trail Mode, the cursor leaves a trail behind as you move it around. You can then “draw in” the map over it (this is really only useful for tunnel-style maps), or you can use it to track your movement over an already mapped area.
Use the T key to toggle Trail Mode; you’ll see two little footsteps in the top-left corner when it’s enabled. Because in this mode you’re modifying the map when moving the cursor, all cursor movements will become undoable actions.
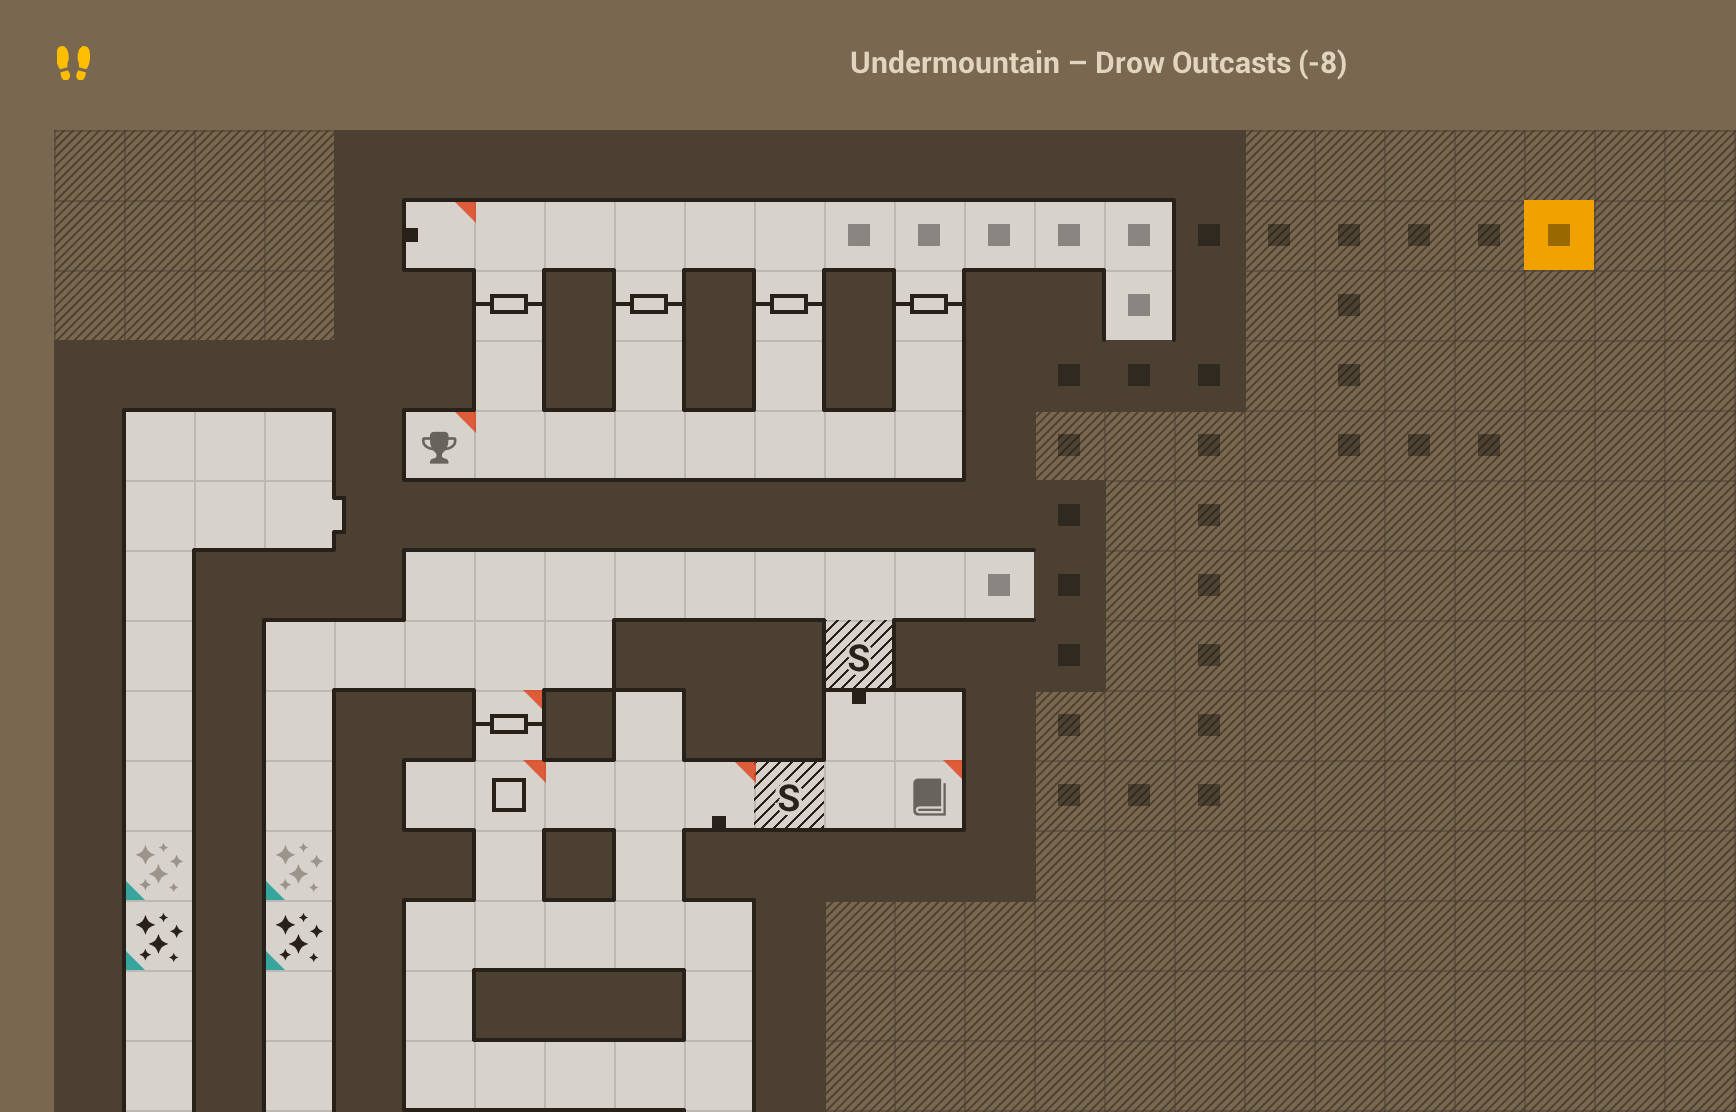
Trail Mode
Similarly to the erase cell tool, you can erase the trail one cell at a time by holding X and using the movement keys. You can only use this tool if Trail Mode is turned off.
To delete the whole trail in the current level only, press Ctrl+Alt+X. To excavate the whole trail in the current level (overwriting existing cell contents), press Ctrl+Alt+D.
The trail data for all levels is saved into the map file.
Note
Trail Mode is turned off automatically when performing an action that would yield confusing or unwanted results with it being on (e.g., creating or deleting levels, changing the current level, jumping with the cursor, or working with Selections).
Editing in WASD Mode
In WASD Mode, the editing modifiers D, W and E are not available because they’re used for movement. But this is not a problem, as in this mode you’re supposed to use mouse modifiers instead for these actions.
For example, to draw tunnels, hold down the left mouse button and use the WASD movement keys.
The following mouse modifiers are available:
Left button – draw tunnel
Right button – draw wall
Right & left buttons – draw special wall
Middle button – erase cell
The mouse cursor must be inside the level area when using the mouse modifiers.
To draw special walls, make sure to press then right mouse button first, then the left button (otherwise you’d end up in draw tunnel mode).
Naturally, the Draw wall repeat tool is available in this mode too.
As the mouse buttons act as editing modifiers in WASD Mode, you need to hold Shift to unlock the Mouse movement actions:
Hold Shift and left-click somewhere inside the level to move the cursor there.
Hold Shift+Ctrl and the left button, or Shift and the middle button and move the mouse to pan the level.
Tip
Some games, such as the renowned Eye of the Beholder series, don’t support WASD-style navigation. Luckily, most emulators (e.g., DosBox and WinUAE) provide a way to remap the cursor keys to the WASD keys in these games.